Building an Abenaki...
Re: Building an Abenaki...
updates? incredible craftsmanship. amazing looking canoe.
-
StuckInTheMud

- Posts: 465
- Joined: Thu Jan 22, 2004 12:53 pm
- Location: San Antonio
Re: Building an Abenaki...
No updates, sorry! I'm near the end of my first semester of dental school here in San Antonio. I wanted to finish this before starting school because I knew I wasn't going to touch it once school started. As she sits right now, I need 2-3 coats of varnish on the inside and to hang the seats and I'll be done, but studying has taken over life since July 1. We finish the semester Dec 12th, and my plan is to get back to varnishing then.
Praying for a small spell of warmer weather around then so that I don't have to fight the varnish too much!! With our wacky Texas winters, I can't imagine that'll be a problem but who knows. HOPEFULLY, by christmas time I can have her finished, maybe
Praying for a small spell of warmer weather around then so that I don't have to fight the varnish too much!! With our wacky Texas winters, I can't imagine that'll be a problem but who knows. HOPEFULLY, by christmas time I can have her finished, maybe
-
StuckInTheMud
- Posts: 465
- Joined: Thu Jan 22, 2004 12:53 pm
- Location: San Antonio
Re: Building an Abenaki...
Supply fail!!!!! 
So, I put down one coat of varnish on the inside of the hull yesterday. When I bought my varnish from west marine here in San Antonio, I thought "i'll probably need more than one can of this stuff, but I'll just come back and get some more when I run out". Well, my current can is not full enough to do another coat of varnish so it was time to go get that second can. Head over to west marine here, and when I pull up in front of the store I see empty windows. THEY"RE GONE!!!! Sadly, my one marine supply store has closed down permanently and I don't know where else in San Antonio to get stuff like marine varnish. Home depot and Lowes only carry the outdoor deck staining stuff, and i'm not putting that over top of Epifanes. I'm headed back to Houston later this week for the holidays so I'll be picking up another can somewhere down there. Good thing I'm almost finished with this boat, I'd be pretty pissed off if I had just started building, found west marine, and then they shut down on me like this. Sorry for the rant, just wanted to provide some update. I thought with 3 weeks break from school, I would surely be able to put down 2 coats of varnish on the inside, varnish the gunnels and decks, install the seats and be finished but no, not so much.
  The weather has even been kind to me, getting up into the 70s during the day to make for nice varnishing weather! Stupid supply store has to go and dry up on me...
So, I put down one coat of varnish on the inside of the hull yesterday. When I bought my varnish from west marine here in San Antonio, I thought "i'll probably need more than one can of this stuff, but I'll just come back and get some more when I run out". Well, my current can is not full enough to do another coat of varnish so it was time to go get that second can. Head over to west marine here, and when I pull up in front of the store I see empty windows.

Re: Building an Abenaki...
StuckInTheMud, Look here duckworksmagazine.com these folks are for people like us building boats and have difficulty finding boat specific stuff. There prices are reasonable and service outstanding.
MM
MM


Re: Building an Abenaki...
Yep, I'd have to say the take away from this is that it's a really good idea to forget buying boat building supplies locally because it seems to always end up problematic; either they don't have what you want, or not in quantity you want, or over priced, or just whatever. Go "mail order" and get exactly what you want/need ... and plan ahead accordingly. Best way to avoid trouble.
I second Duckworks as a Most Excellent supplier; I know Chuck Leinweber personally and have visited his business in Harper, Texas, and will confidently vouch for him any old time. Besides, with a name like Duckworks it HAS to be good.
http://www.duckworksbbs.com" onclick="window.open(this.href);return false;
-
bowgarguide

- TKF 5000 Club

- Posts: 5370
- Joined: Mon Jan 15, 2007 7:52 pm
Re: Building an Abenaki...
I buy at Benjiman Moore here in Waco ,they always keep it instock.
Ron
Ron
-
StuckInTheMud
- Posts: 465
- Joined: Thu Jan 22, 2004 12:53 pm
- Location: San Antonio
Re: Building an Abenaki...
Well, I picked up some more varnish while at home in Houston for the holiday. Back in San Antonio now and was going to varnish this past saturday before the cold hit. I opened my old can that I had a little bit left in, and I don't know if it was too cold or if I didn't close it well enough but the varnish looked kind of chunky almost. Might have let air get into it I didn't have a little hot plate or anything to heat it up, so I assumed that it was just cold so instead of trying to varnish, i just sanded the inside of the hull and got it ready to put on another coat. Will plan to do that this coming weekend when it warms back up here. Once that coat dries, I'll be doing the rails and decks. Then install the seats! I still have to make little "dealies" to hide my bolts. Pardon my technical term, I can't think of the proper name for the blocks that hide your seat bolts, haha.
I think this thing is finally getting close!!!!!
I think this thing is finally getting close!!!!!
-
StuckInTheMud
- Posts: 465
- Joined: Thu Jan 22, 2004 12:53 pm
- Location: San Antonio
Re: Building an Abenaki...
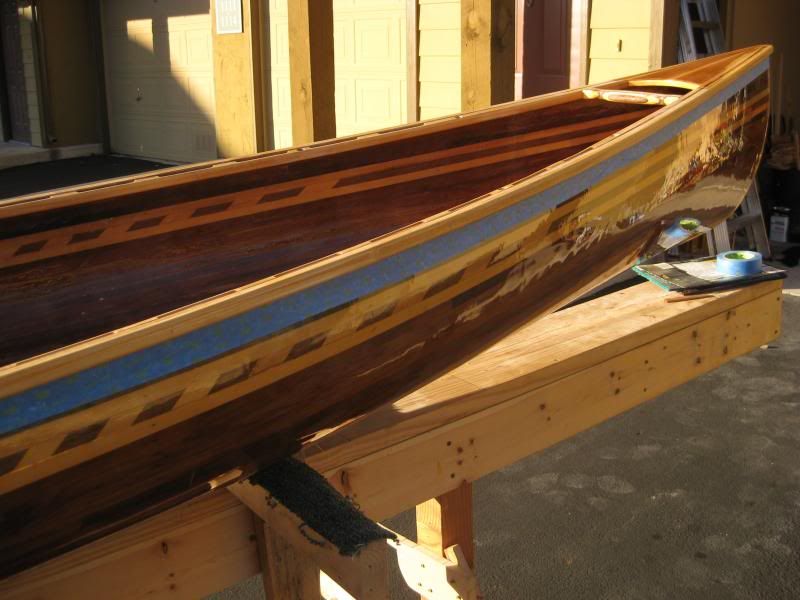
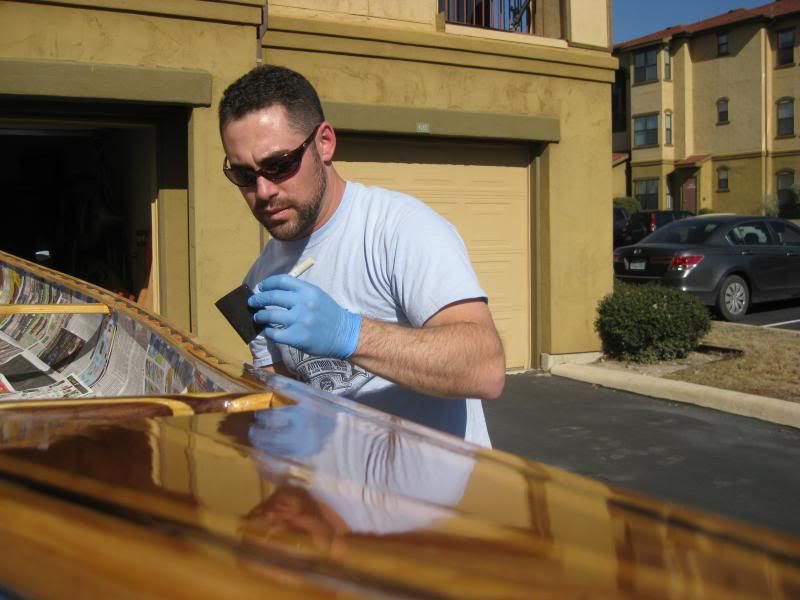
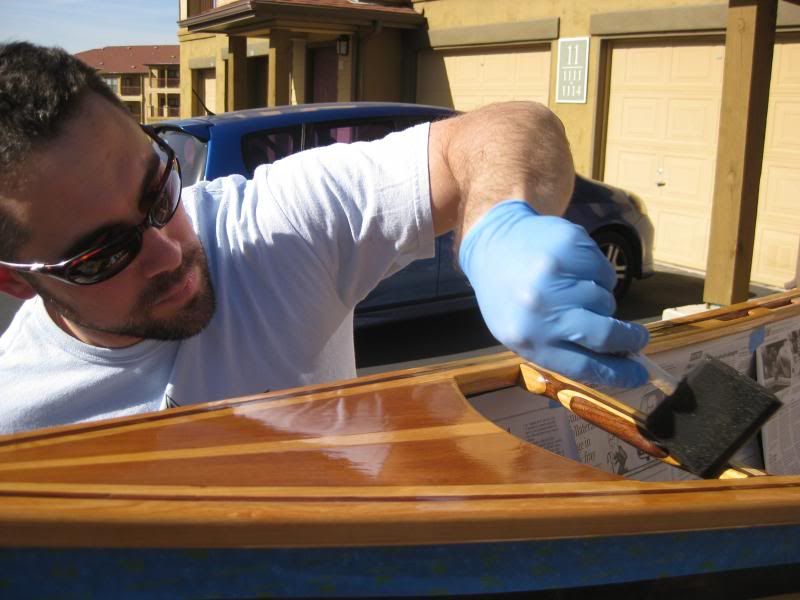
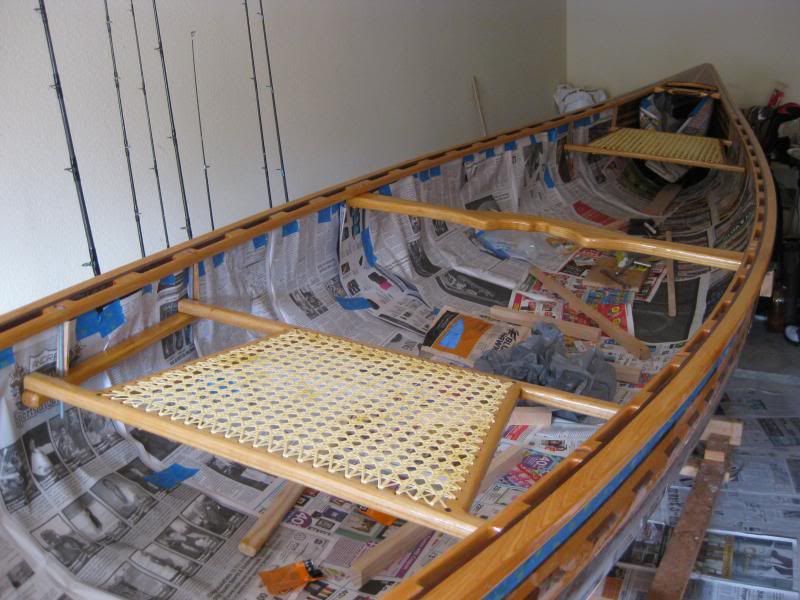
Ok, so I've put in some more time on the canoe. Here's where we stand: I'm done varnishing the inside hull. I've taped off the outside of the gunnels in prep to varnish those, and I need to go track down some newspaper or something to lay down inside to keep drips off of there. That might be a this weekend project, depending on how much studying I need to get done. I also need to make up some blocks to hide my hangar bolts for the seats.
Here she is currently:
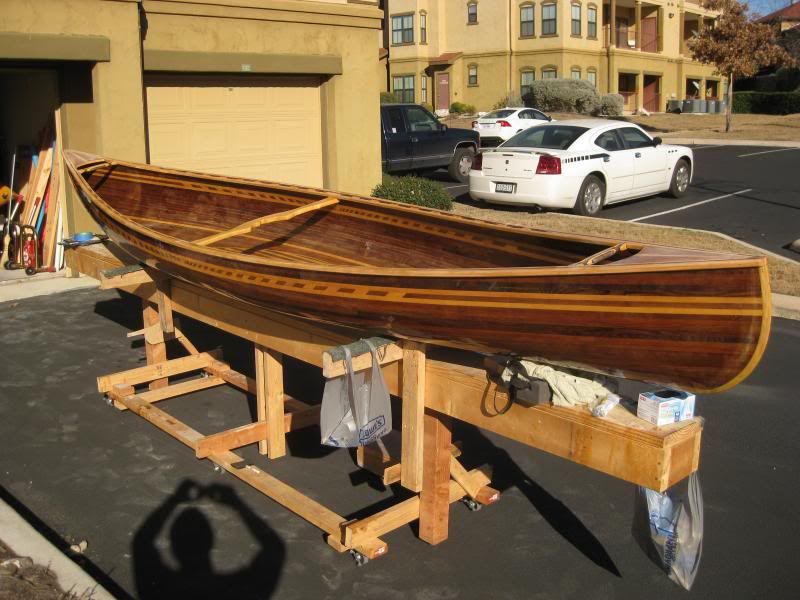
Outer hull is taped off
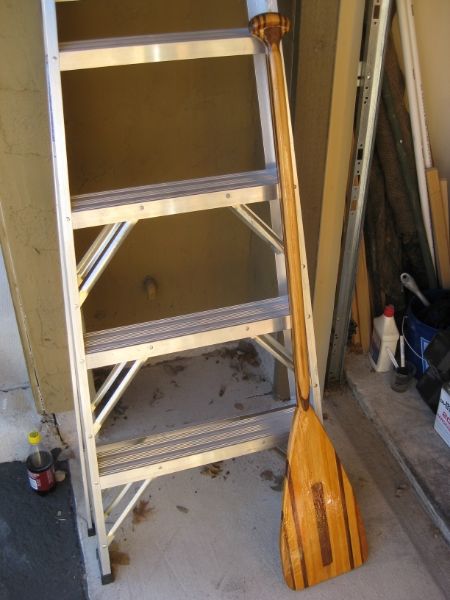
I also did a little side project and made my own paddle stick
Here she is currently:

Outer hull is taped off

I also did a little side project and made my own paddle stick

-
Dogpaddlin
- Posts: 874
- Joined: Tue Sep 18, 2007 5:34 pm
- Location: Round Rock
Re: Building an Abenaki...
Lookin good! Glad to see you are keeping yourself properly hydrated! I bet I drank a 1,000 of those things while building mine.
-
StuckInTheMud
- Posts: 465
- Joined: Thu Jan 22, 2004 12:53 pm
- Location: San Antonio
Re: Building an Abenaki...
They are a TASTY drink. Dr recommended…. 
Re: Building an Abenaki...
Ugh, I think I'd rather chug the charcoal starter myself.  Young people, sheesh.
EDIT: Whoops, forgot to comment on how good everything's looking, didn't I? My bad, old people forget stuff y'know.
EDIT: Whoops, forgot to comment on how good everything's looking, didn't I? My bad, old people forget stuff y'know.
-
StuckInTheMud
- Posts: 465
- Joined: Thu Jan 22, 2004 12:53 pm
- Location: San Antonio
Re: Building an Abenaki...
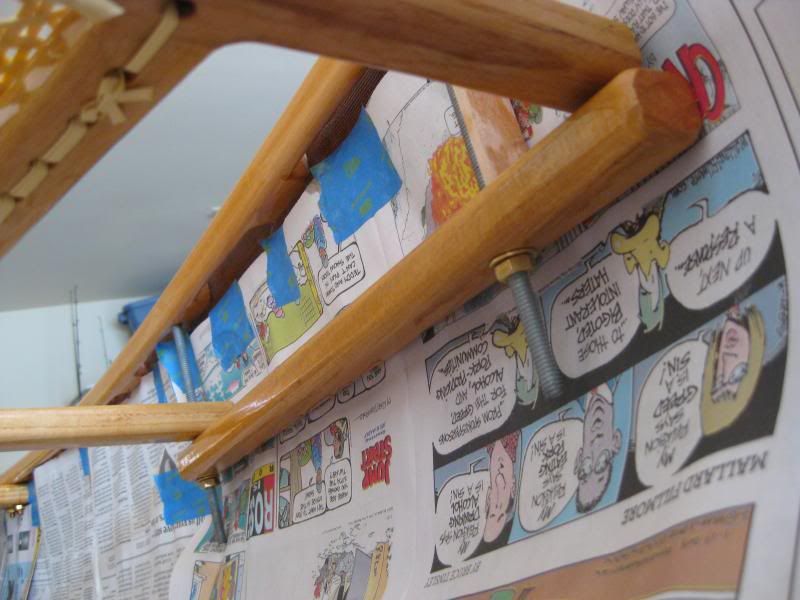
Great weather for varnishing today here in San Antonio!! So naturally, I got to it. First up is getting the inside ready to keep drips off.
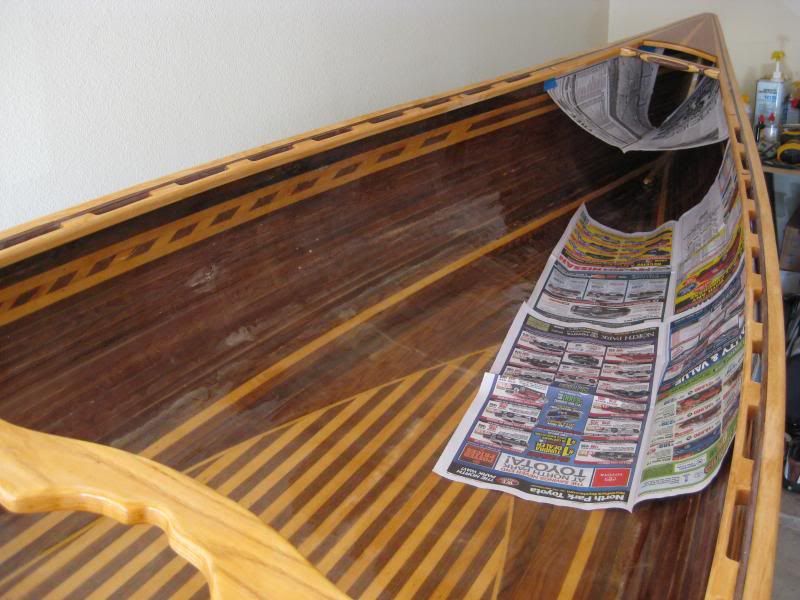
Some light reading for when I get bored while out paddling…
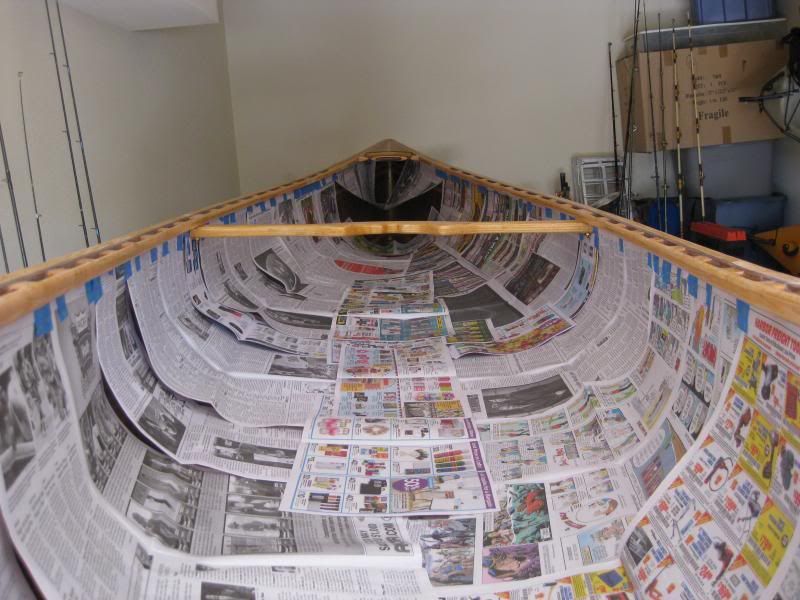
I'll go back tomorrow and put a light sanding on that stuff, and then put one more coat to the deck/gunnels and be done with varnish.

Some light reading for when I get bored while out paddling…


I'll go back tomorrow and put a light sanding on that stuff, and then put one more coat to the deck/gunnels and be done with varnish.
Re: Building an Abenaki...
Oh man I'd be scared to put that thing in the water!
Hahahahahaha, I can't believe I really just said that, lol.
Hahahahahaha, I can't believe I really just said that, lol.

Re: Building an Abenaki...
Amazing work of art you are crafting! Can't wait to see the final product!
-
StuckInTheMud
- Posts: 465
- Joined: Thu Jan 22, 2004 12:53 pm
- Location: San Antonio
Re: Building an Abenaki...
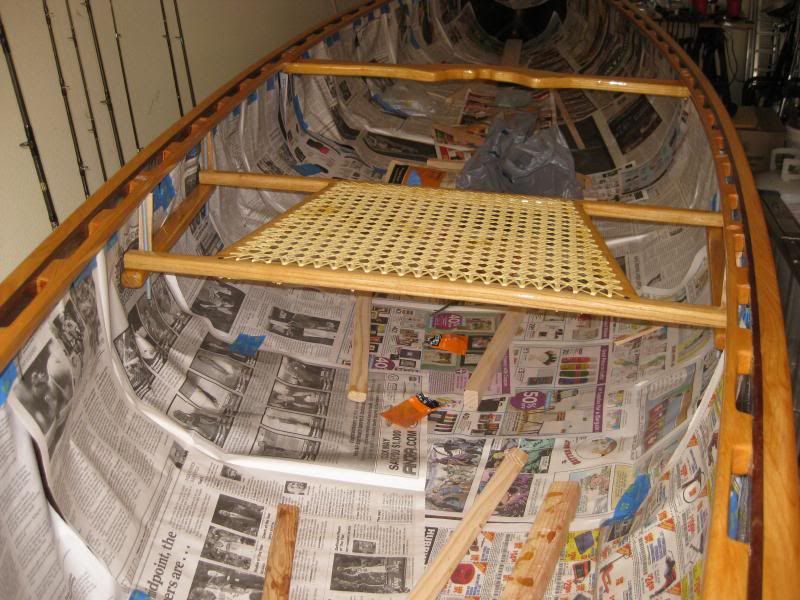
Tinkering around a little more, I have seats temporarily installed, aaaaaaahhhhhh!! (little girl scream)
Question though in terms of how low to drop them from the gunnel: Do you keep the distance the same for all 4 bolts? What you're seeing in there right now is 4 "simulated" blocks, all of them are 3 inches long. Once I figure out if I want my seats this distance from the gunnel, I'll be making some wood spacers that the bolt will slide through so you don't even see it. I'm just trying to figure out the height piece right now, not really sure on that one. If I'm going to need to level them, I'll have to level the boat first since its just sitting on the strong back on 2x4s.
You'll see, my front seat is actually sitting on 2 rails. In my infinite planning wisdom, I didn't quite plan out my seat placement when cutting my scuppers. According to the plans I have, I would be needing to hang the bolts where I had taken away material, so my next thought was to put bolts where I could and then just put the seat on the rails like you see. Back seat world out ok.
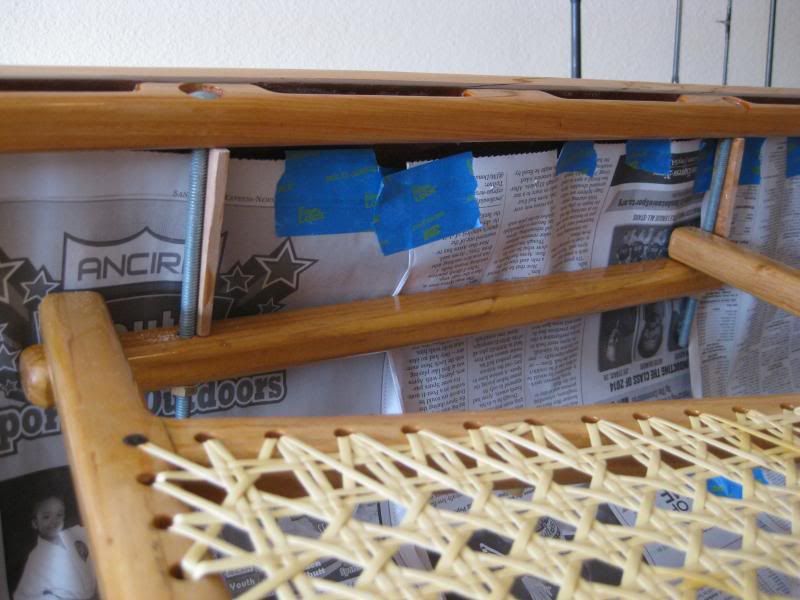
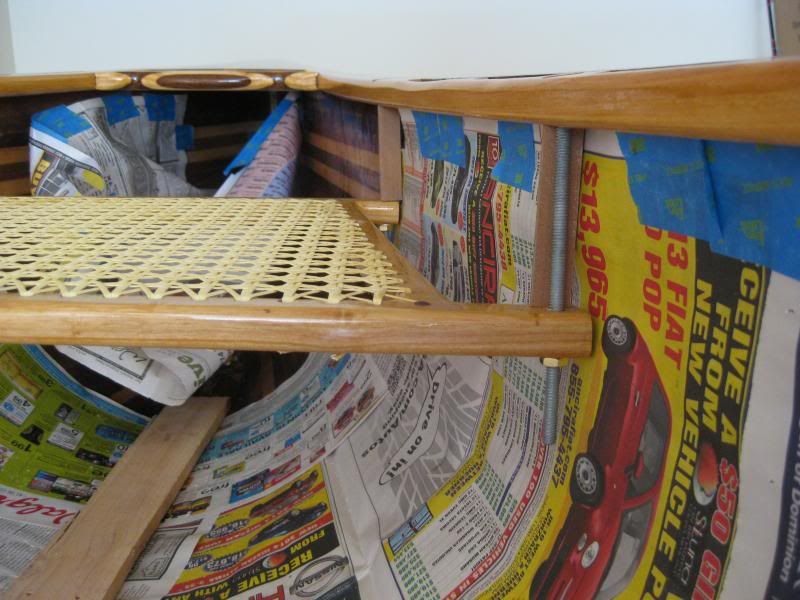


Re: Building an Abenaki...
Very cool! Gettin' close there, bud!! 
Seat height and tilt is subject to preferences, paddling style, etc., etc., but unless you have specialized use envisioned I'd just set 'em level to start. The lower you set the seats, the more stable the boat will feel - but I would consider setting them high enough to get your feet under so you can assume a kneeling position should you hit unstable conditions like riffles, rapids, waves, and things like that. Kneeling increases your connection to the boat and lowers your center of gravity ... you'll feel the advantage instantly the first time you try it. It's also just the right posture in case you need to start praying...
Seat height and tilt is subject to preferences, paddling style, etc., etc., but unless you have specialized use envisioned I'd just set 'em level to start. The lower you set the seats, the more stable the boat will feel - but I would consider setting them high enough to get your feet under so you can assume a kneeling position should you hit unstable conditions like riffles, rapids, waves, and things like that. Kneeling increases your connection to the boat and lowers your center of gravity ... you'll feel the advantage instantly the first time you try it. It's also just the right posture in case you need to start praying...
Re: Building an Abenaki...
wow...!
-
Dogpaddlin
- Posts: 874
- Joined: Tue Sep 18, 2007 5:34 pm
- Location: Round Rock
Re: Building an Abenaki...
I'll echo what Pogo said, its all personal preferance. Personally, I like my seat HIGH. I have even considered setting it flush with the gunnels. Since you are making blocks to conceal the the bolts I would test it at your lowest feasible location, then if you want to raise it all it takes is 30 seconds on a chopsaw.
Keep it up and you will be paddling that beauty this spring! Let me know if you want the company of another woody when you launch her, San Antonio is a quick trip on toll road 130, I LOVE the 85mph speed limit!!!
Keep it up and you will be paddling that beauty this spring! Let me know if you want the company of another woody when you launch her, San Antonio is a quick trip on toll road 130, I LOVE the 85mph speed limit!!!
-
StuckInTheMud
- Posts: 465
- Joined: Thu Jan 22, 2004 12:53 pm
- Location: San Antonio
Re: Building an Abenaki...
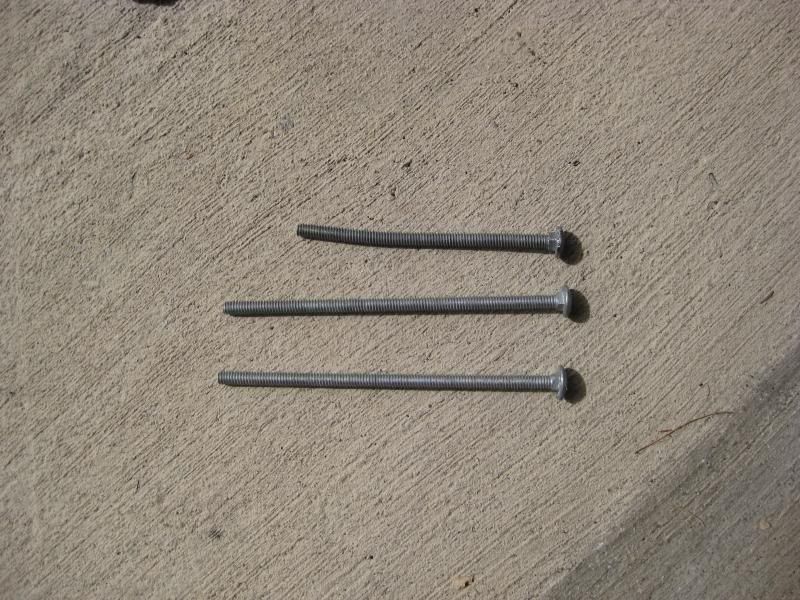
I guess every good story needs a little failure sprinkled in there somewhere, just to keep it realistic. That little sprinkling showed up yesterday. From the last pictures, you could see that the seats were hanging in the boat. Yesterday I took to trying to level out the front seat, as I wanted to get it all level and then clamp the seat to the little "runner" boards so that I could assemble that as one piece with a few screws. Well, I got things pretty level, and then I went to loosen all the nuts so I could remove the seat. First 2 nuts came off fine, no problems. The other 2, totally different story. I really don't know what happened. Maybe it was just the awkward angle of trying to loosen the nut, but I managed to straight up shear one of the bolts off. Removing the first nut was a pretty good challenge, but it came off without major failure. The second one is the one managed to shear apart. Even though I managed to actually remove the nut from the first bolt without issue I'm still not sure its ok. Here you can see the stress failure with the top one, shorter and clearly warped.
So that was my first frustration of the afternoon. I did manage to get all the hanger bolts out, and with my seat still clamped to the runner boards I figured I would at least screw those pieces together. Had some 1-1/4" brass screws, pre-drilled my holes, and went to put the first screw in. It starts going fine, piece of wood chips out and I was like shoot. "well, it will still be on the bottom and no one will see that, I'll keep going." Before the screw makes its way through this piece to actually get into the wood of the seat frame, the screw shears off. My frustration is building at this point. With all my determination, I thought maybe I just had a flawed screw, so I decided to try one on the other side. Pre-drill my hole, start screwing. Same exact thing happens.
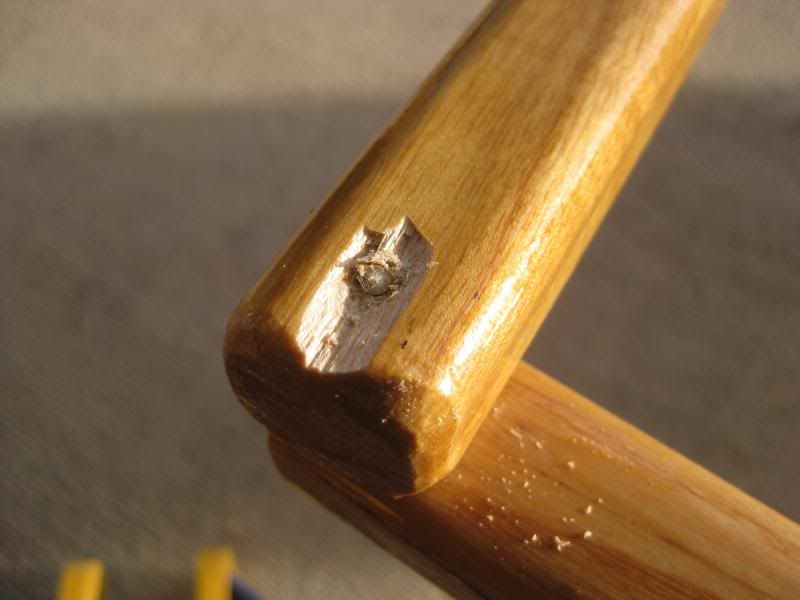

These pieces are made of Ash, just like my seat frames. In retrospect, maybe brass is too soft of a metal to be screwing into a hard wood like ash? Maybe my pilot holes weren't large enough, causing too much resistance as they sank into the wood? I really don't know, but I won't be using brass screws when I attempt this again. Thankfully, these were just two pieces that can easily be re-made and I happen to have 2 more ash sticks just this length. Minor setback, but nothing major was really damaged. Still, really really frustrating.

So that was my first frustration of the afternoon. I did manage to get all the hanger bolts out, and with my seat still clamped to the runner boards I figured I would at least screw those pieces together. Had some 1-1/4" brass screws, pre-drilled my holes, and went to put the first screw in. It starts going fine, piece of wood chips out and I was like shoot. "well, it will still be on the bottom and no one will see that, I'll keep going." Before the screw makes its way through this piece to actually get into the wood of the seat frame, the screw shears off. My frustration is building at this point.


These pieces are made of Ash, just like my seat frames. In retrospect, maybe brass is too soft of a metal to be screwing into a hard wood like ash? Maybe my pilot holes weren't large enough, causing too much resistance as they sank into the wood? I really don't know, but I won't be using brass screws when I attempt this again. Thankfully, these were just two pieces that can easily be re-made and I happen to have 2 more ash sticks just this length. Minor setback, but nothing major was really damaged. Still, really really frustrating.
-
StuckInTheMud
- Posts: 465
- Joined: Thu Jan 22, 2004 12:53 pm
- Location: San Antonio
Re: Building an Abenaki...
Just a wild idea (because I don't know any better) but is it possible that I could actually drill out these two screw pieces without making too large of a hole?
My thought process here: If its possible to get these two out of here without causing further damage, then I could do that and the use a slightly thicker screw (stainless this time, so that the shear factor won't happen) and then assemble my seat as planned. Would save me some time of having to reconstruct these two pieces.
What do you guys think?
-
Dogpaddlin
- Posts: 874
- Joined: Tue Sep 18, 2007 5:34 pm
- Location: Round Rock
Re: Building an Abenaki...
Man that sucks. At least your keeping the right attitude about it. The garage door caught my Merlin a couple months ago and ripped a a very small piece of the stem. To me it was like the boat was totaled 
My guess is you will need a drill press IF you can make that work. The brass is nice and soft, but not as soft as ash. You will need to flatten out the top and use a center punch to help guide your bit. Also use a drill press vice or clamp it really well, you won't want it sliding around AT ALL.
My guess is you will need a drill press IF you can make that work. The brass is nice and soft, but not as soft as ash. You will need to flatten out the top and use a center punch to help guide your bit. Also use a drill press vice or clamp it really well, you won't want it sliding around AT ALL.
-
bowgarguide
- TKF 5000 Club
- Posts: 5370
- Joined: Mon Jan 15, 2007 7:52 pm
Re: Building an Abenaki...
Get you a dremel tool and cut a slot in the top to fit a screw driver ,most of the time you can unscrew them .
Also take a soldering iron and heat them up as hot as you can with out burning the wood ,then let it cool all the way ,that should loosen them some more.
Ron
Also take a soldering iron and heat them up as hot as you can with out burning the wood ,then let it cool all the way ,that should loosen them some more.
Ron
-
Dogpaddlin
- Posts: 874
- Joined: Tue Sep 18, 2007 5:34 pm
- Location: Round Rock
Re: Building an Abenaki...
Leave it to an old redneck to over simplify things...bowgarguide wrote:Get you a dremel tool and cut a slot in the top to fit a screw driver ,most of the time you can unscrew them .
Also take a soldering iron and heat them up as hot as you can with out burning the wood ,then let it cool all the way ,that should loosen them some more.
Ron
-
bowgarguide
- TKF 5000 Club
- Posts: 5370
- Joined: Mon Jan 15, 2007 7:52 pm
Re: Building an Abenaki...
Been there done that before.
Ron
-
StuckInTheMud
- Posts: 465
- Joined: Thu Jan 22, 2004 12:53 pm
- Location: San Antonio
Re: Building an Abenaki...
I'm really excited to try this out! I'm waiting until Friday though since thats my "day off" from studying. Will report back later. If this works, i'm going to be elated. I can handle the little chips out of the wood since those will be facing the bottom of the boat anyway, aint nobody gonna see that!! Having to not completely make 2 more sticks, epoxy, varnish and drill them will save so much effort!