Building an Abenaki...

User avatar
StuckInTheMud
Posts: 465
Joined: Thu Jan 22, 2004 12:53 pm
Location: San Antonio

Building an Abenaki...

Post by StuckInTheMud »

So i'm back from A-stan, and i went and took a look at Birke's Abenaki and i liked it a lot. Ordered the plans so now i wait. I'm gonna go to lowes and pick up wood for the forms, so how big of a sheet of ply do I need? I've read about using MDF, any other material i could get away with using or is this generally what folks go with for forms?

This will be kind of a slow build along, i'm hoping to be done mid-fall. Taking a class right now thats a little more important, but i'm excited about this. It'll be my first stripper so i'll have lots of questions on planing, fairing, and things of that nature. Stay tuned, its time to start shopping for wood.... I'm excited about this :dance:
User avatar
bowgarguide
TKF 5000 Club
TKF 5000 Club
Posts: 5370
Joined: Mon Jan 15, 2007 7:52 pm

Re: Building an Abenaki...

Post by bowgarguide »

Just a warning YOU CAN NOT JUST BUILD one ,.
Welcome to the darkside
Ron
Dogpaddlin
Posts: 874
Joined: Tue Sep 18, 2007 5:34 pm
Location: Round Rock

Re: Building an Abenaki...

Post by Dogpaddlin »

I used 5/8" mdf for the forms on my Merlin and have no complaints, it is cheap, flat, and easy to work with. I started laying the strips last weekend and plan on making a post later this week.
User avatar
Pogo
TKF 3000 Club
TKF 3000 Club
Posts: 3627
Joined: Mon Jul 28, 2003 4:49 pm
Location: League City
Contact:

Re: Building an Abenaki...

Post by Pogo »

StuckInTheMud wrote:...........i'm excited about this. It'll be my first stripper.........
Your very first stripper! Ah, to be young again.............. :roll:

Glad to hear you're back! I hear A'stan is lovely this time of year, but perhaps Texas will do in a pinch. 8)
barditch
TKF 2000 club
TKF 2000 club
Posts: 2426
Joined: Sat Apr 12, 2008 8:42 pm
Location: Guadalupe County
Contact:

Re: Building an Abenaki...

Post by barditch »

Pogo wrote:
StuckInTheMud wrote:...........i'm excited about this. It'll be my first stripper.........
Your very first stripper! Ah, to be young again.............. :roll:

Glad to hear you're back! I hear A'stan is lovely this time of year, but perhaps Texas will do in a pinch. 8)
8) Ah, Pogo, you're like me...the pictures of your life are black-and-white silent movies with a really bad piano player to set the mood :lol: :lol: :lol:

Seriously, Stuck...welcome, home, and thanks for having made the trip!
Remember--measure twice cut once...and "Awcrap is really one word!"
Red
User avatar
gerald
TKF 4000 Club
TKF 4000 Club
Posts: 4174
Joined: Thu Jun 12, 2003 10:48 am
Location: Gatesville, tx www.theoldmansboats.com

Re: Building an Abenaki...

Post by gerald »

You can use mdf but I find it's better to use 1/2" baltic (or russian) plywood that I find at McCoy's. Last time i bought any it was $25 for a 5' X 5' sheet. Plenty for one boat.
User avatar
StuckInTheMud
Posts: 465
Joined: Thu Jan 22, 2004 12:53 pm
Location: San Antonio

Re: Building an Abenaki...

Post by StuckInTheMud »

Well, i'm stuck in a holding pattern until my source for a table saw and planer gets his tools unpacked. He's waiting to move into a house thats being built. I've got my wood sitting and waiting, and my strongback built.

Forms traced out, waiting to be cut. I only have a jigsaw, so I cant say the curves are nice and perfect but I got them as close as I could. Wish i had something fancy like a bandsaw so i could just move the piece of wood around the blade, but you make due and hope it works out.
Image

Stem forms
Image

Here are some of them, cut out
Image
User avatar
StuckInTheMud
Posts: 465
Joined: Thu Jan 22, 2004 12:53 pm
Location: San Antonio

Re: Building an Abenaki...

Post by StuckInTheMud »

For the strongback, kind of wish I had left an overlap on the edges to clamp things to, but it may work out to be no big deal. Not really sure since I've never done this before, but we'll see once i get building.

Image

Image

Image

Put the forms on and came back later to make sure they were level and plumb. That was a fun little task, unscrewing the forms, shimming, tightening screws, and repeating until it was plumb and flush.

Cant wait until I can start actually stripping this thing. In the mean time, i started a side project of making another wooden seat for my pirogue. Made one before, and somehow between last fall and now its gone missing. Not sure if it was yanked from the back of my truck after a float trip or what, but I cant find it anywhere. Snagged me a free pallet today and sanded and cut the boards. The frame for the chair is put together so now I just have to cut those pallet boards into strips and nail them on. For the short length I use as cross members on this seat, pallets make great free wood when you can snag one. Dont be scared by the ugly look of the pallet either, if you can find one that looks half decent to start with once you sand it down it'll be perfect.
barditch
TKF 2000 club
TKF 2000 club
Posts: 2426
Joined: Sat Apr 12, 2008 8:42 pm
Location: Guadalupe County
Contact:

Re: Building an Abenaki...

Post by barditch »

:D If it looks anything like HirschHunters', you'll have an heirloom! We're watching. if I built one of those things, the next thing that I'd have to do is head straight for the Boundary Waters, get it wet and head for the sunset! That's its natural home! Very few paddling places in the world any better! :dance:
Dogpaddlin
Posts: 874
Joined: Tue Sep 18, 2007 5:34 pm
Location: Round Rock

Re: Building an Abenaki...

Post by Dogpaddlin »

Looking good! Setting up the forms was the hardest part for me, now the fun part starts. 8)
User avatar
StuckInTheMud
Posts: 465
Joined: Thu Jan 22, 2004 12:53 pm
Location: San Antonio

Re: Building an Abenaki...

Post by StuckInTheMud »

Finally, my friend was home and had time for me to come over and borrow his toys. This ripping your own strips thing takes some time, let me tell ya. Maybe its just because i've never done this before so its all a learning experience, but eh, its fun making sawdust!!

Started with this...
Image


Got to his place, set up the saw and the planer and went to town re-sawing boards to make less work for the planer
Image
Image

Those 2x4s and 2x6s were starting to get smaller!
Image

Once all the boards were cut to the approximate thickness, it was time to plane them down
Image
Image
Image

Last picture there is me, just to prove I was actually doing this stuff, haha. Sadly, no strips were cut today since this process took us a while and he still had to work on finishing his fence, but we got a lot done in my book. Kept all my re-sawn boards together so when its time to start this game I'll have "choices" to pick from in my coloring. Might be going back tomorrow to cut strips. Getting closer to starting to strip this thing out, i'm getting excited!
User avatar
StuckInTheMud
Posts: 465
Joined: Thu Jan 22, 2004 12:53 pm
Location: San Antonio

Re: Building an Abenaki...

Post by StuckInTheMud »

Saturday was a productive day, and I now have strips to start building! (on a side note, I know the shop looks way too clean in the background! Thing is, it isnt my garage so I did my part to make sure it stayed clean. Not sure how the guy likes to keep his shop so I err on the side of clean)

Image
Image

Image

Got done just as the sun was going down, so i loaded up all my strips and headed home. Sunday I went out and started messing around with these strips, figuring out how they'll bend around the forms, seeing what I need to do to the forms to shape them correctly, and just taking stock of what I have. I made shelves on my strongback to hold these strips out of the way

Image

I started messing with the stem pieces, dry fitting them and marking how they fit together.

Image
Image

And then it was time to mix up some epoxy, thicken it up, and start gluing!

Image

My Shinto should get here wednesday. Then I'll be able to really shape my forms and start working on these stems. Trying to plane MDF is like trying to herd cats. You'll get there eventually, but its just not worth the effort.
barditch
TKF 2000 club
TKF 2000 club
Posts: 2426
Joined: Sat Apr 12, 2008 8:42 pm
Location: Guadalupe County
Contact:

Re: Building an Abenaki...

Post by barditch »

8) Hang in there, man...if you can do Aghanistan, this is a walk on the beach...the quiet and tha patience is what makes this business its own reward! I'm a known rounder, but, I can sit there and do fine stockwork or boat work by the hour at the slowest pace, because it is its own reward, and the pleasure of doing it right is quietly seeing the work come to fruition, exactly like you had it in your mind's eye!
User avatar
preacher
TKF 2000 club
TKF 2000 club
Posts: 2385
Joined: Wed Aug 15, 2007 8:56 am
Location: Winnie, Texas
Contact:

Re: Building an Abenaki...

Post by preacher »

Looking good man! Looks like you may have a little experience doing wood work. If not your doing very good. Don't know if you are in to stress like the rest of us who have to make a living, if so this is the best way to push it aside. Make sure you have fun while you build and don't be afraid to try something new.
barditch
TKF 2000 club
TKF 2000 club
Posts: 2426
Joined: Sat Apr 12, 2008 8:42 pm
Location: Guadalupe County
Contact:

Re: Building an Abenaki...

Post by barditch »

preacher wrote:Looking good man! Looks like you may have a little experience doing wood work. If not your doing very good. Don't know if you are in to stress like the rest of us who have to make a living, if so this is the best way to push it aside. Make sure you have fun while you build and don't be afraid to try something new.
8) Well said, Preacher...you are so right!
User avatar
StuckInTheMud
Posts: 465
Joined: Thu Jan 22, 2004 12:53 pm
Location: San Antonio

Re: Building an Abenaki...

Post by StuckInTheMud »

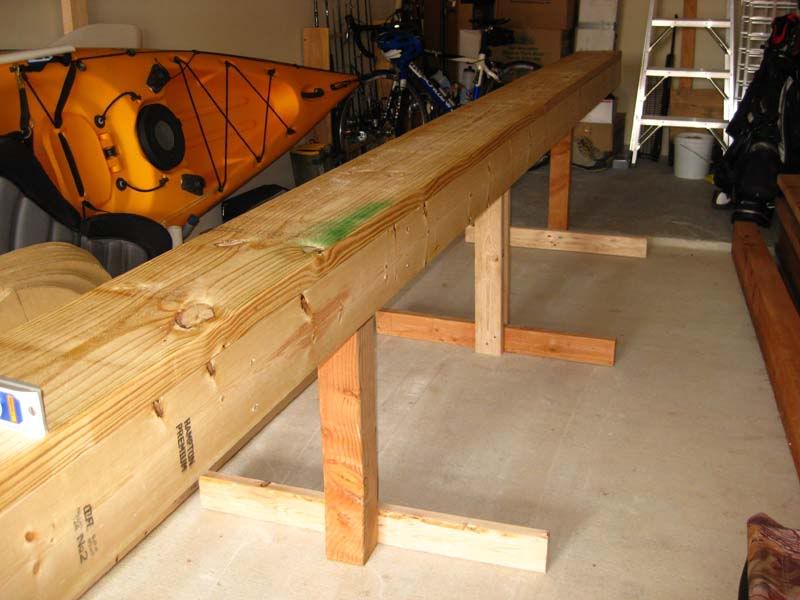
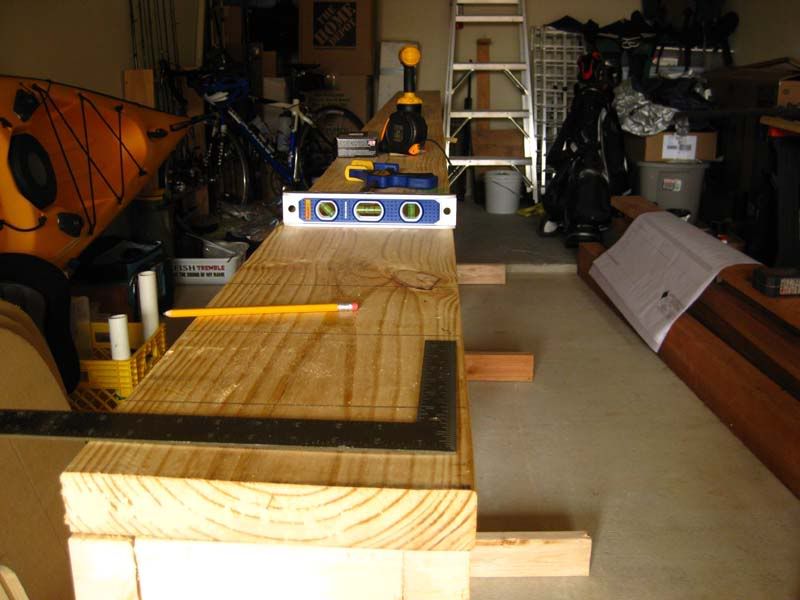
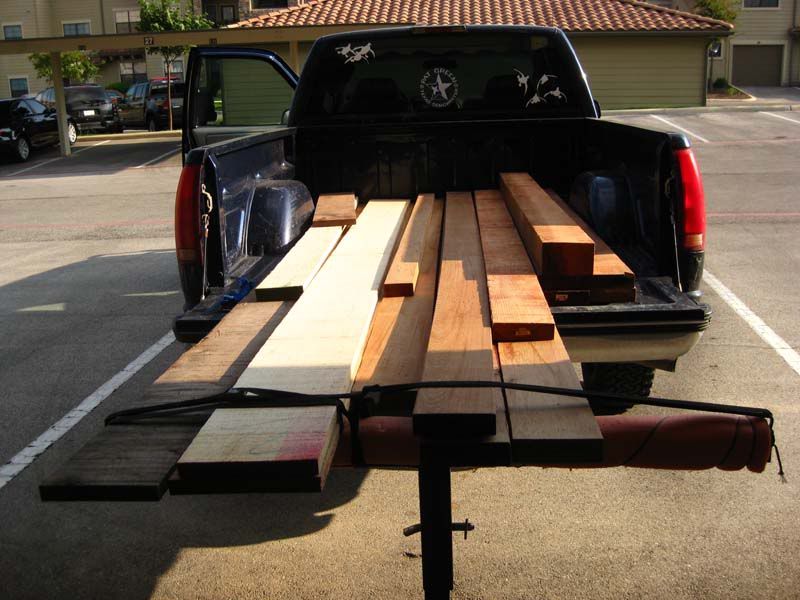
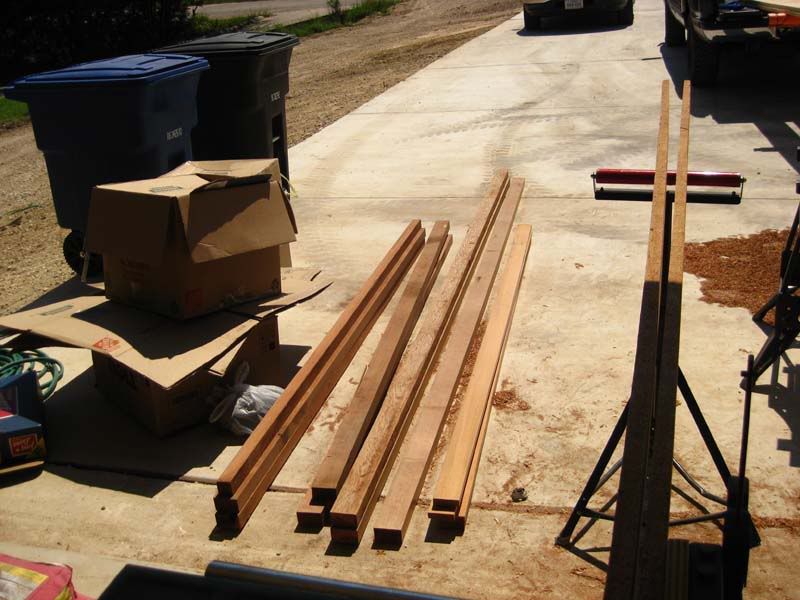
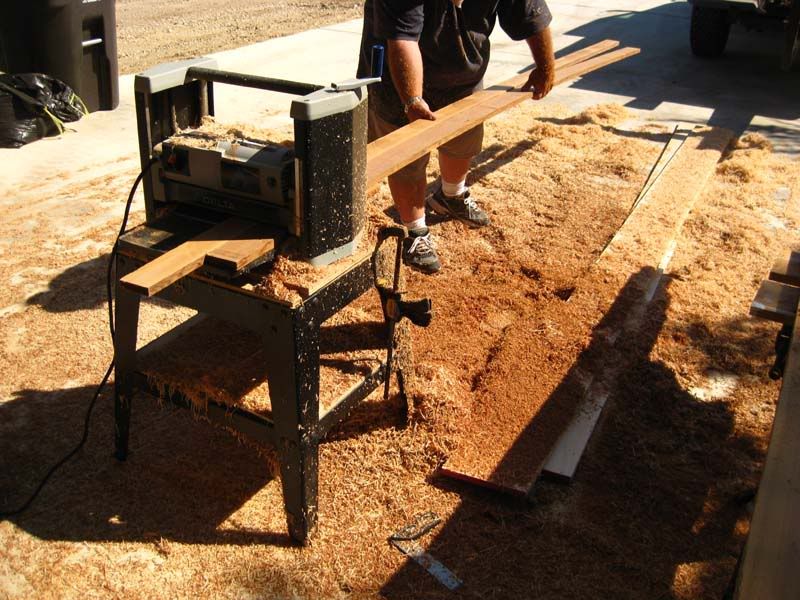
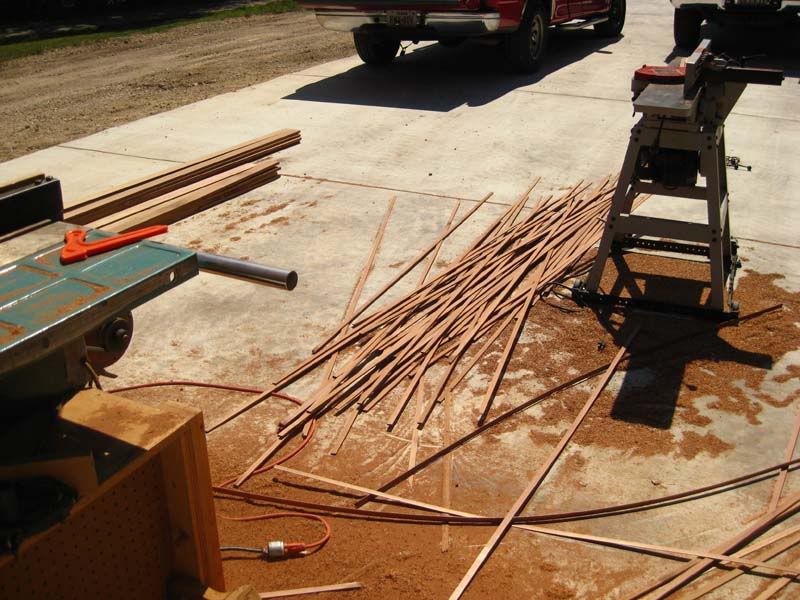
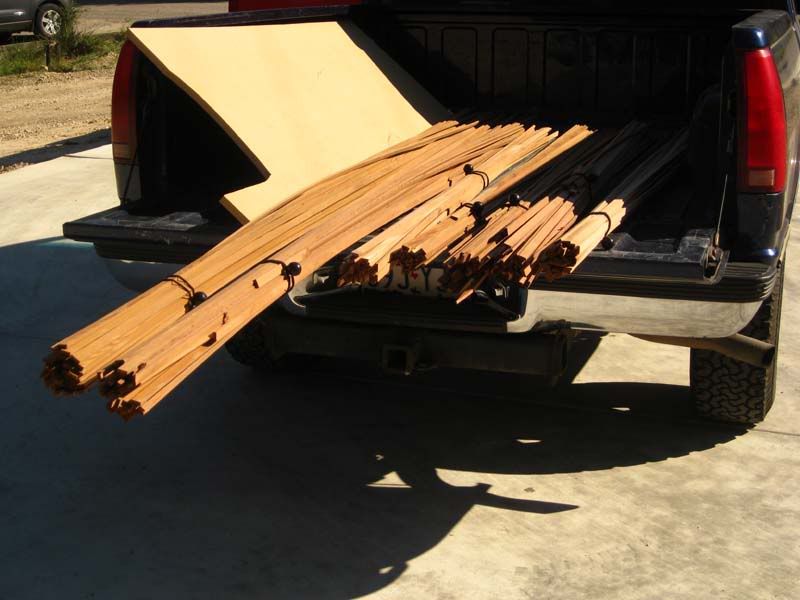
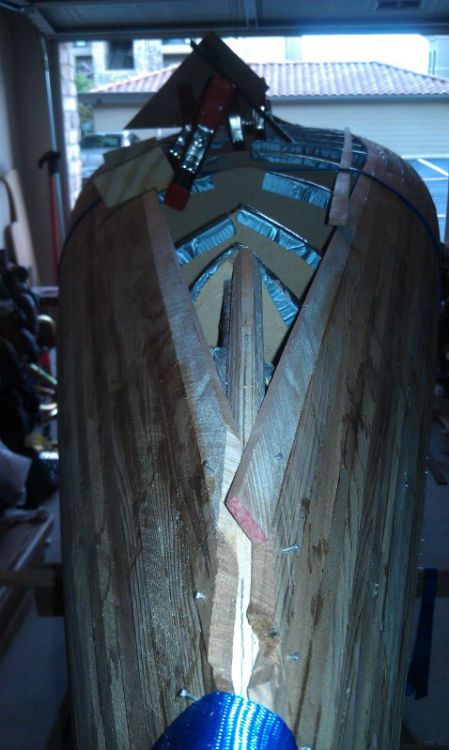
Been pretty busy this past week, making good ground on this thing. Left off with my stems drying, and once they dried it was time to shape them. Wish i had a sturdy workbench to clamp them to, but i had to improvise so I took a large leftover piece of MDF, clamped that to my tailgate of my truck, and that gave me a nice sturdy place to work so I could really put some elbow grease into planing these stems down. Dont actually have a picture of that though of course, haha
Image
Image
Image

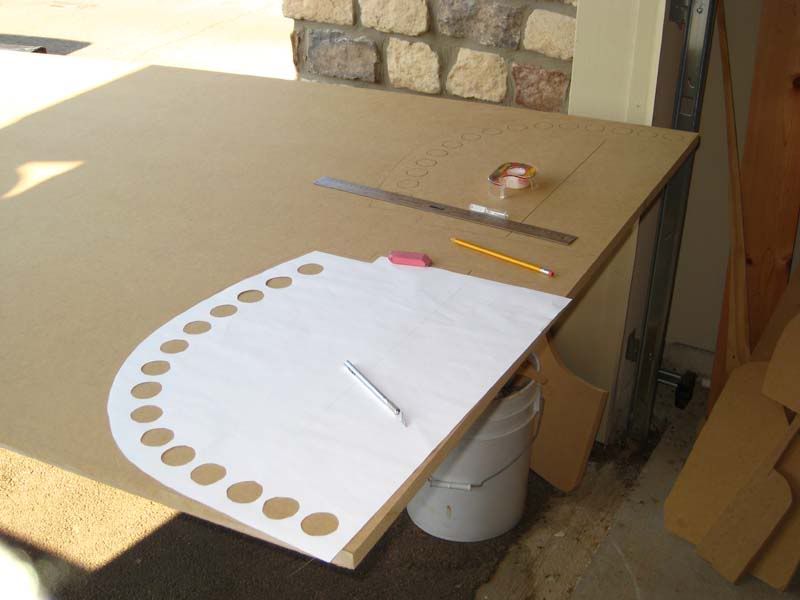
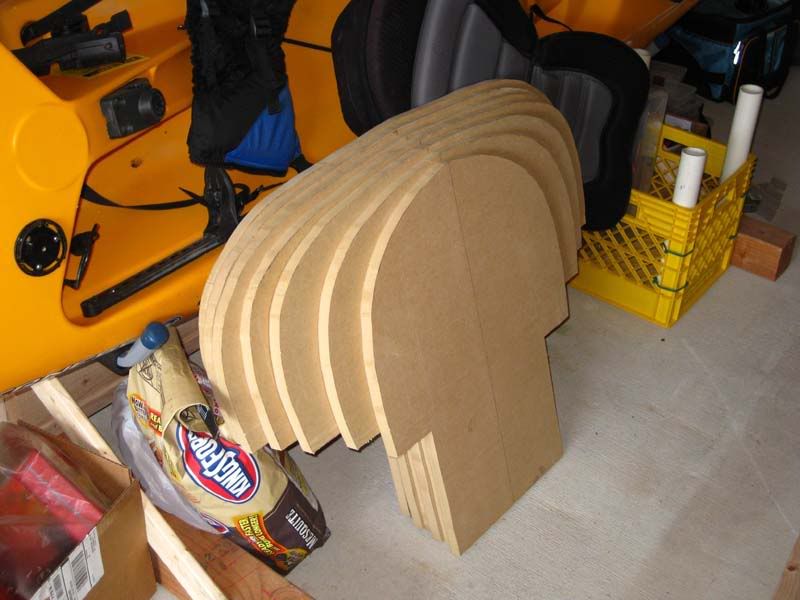
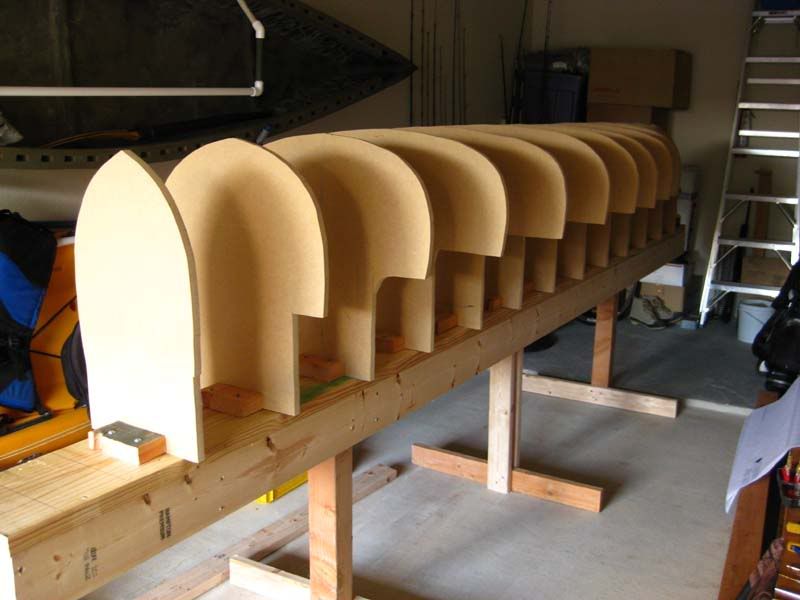
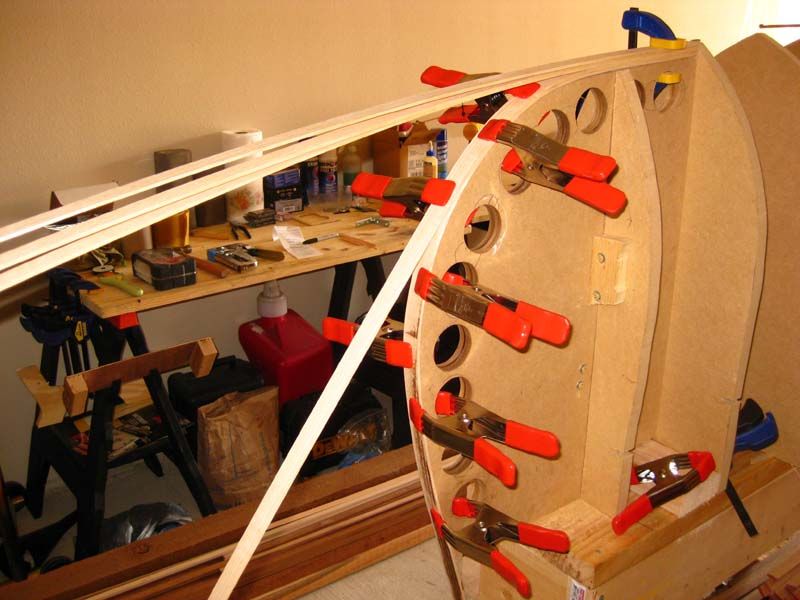
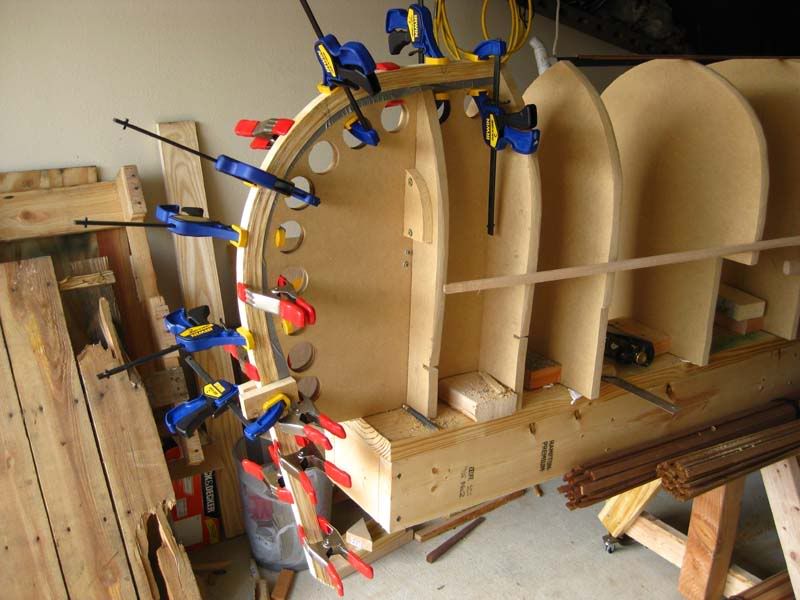
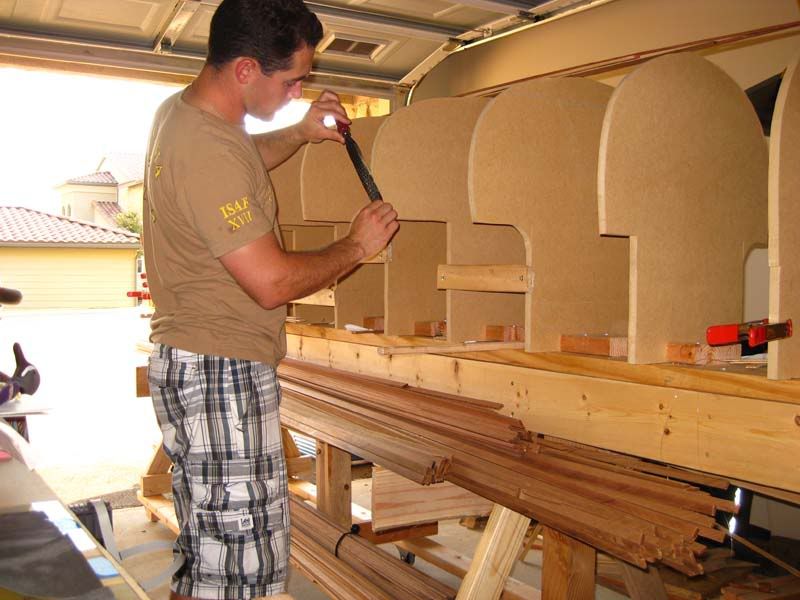
My Shinto rasp came in the mail while I was working on my stems so i finally got to put a good taper on my forms. Man this thing is sweet!

Image

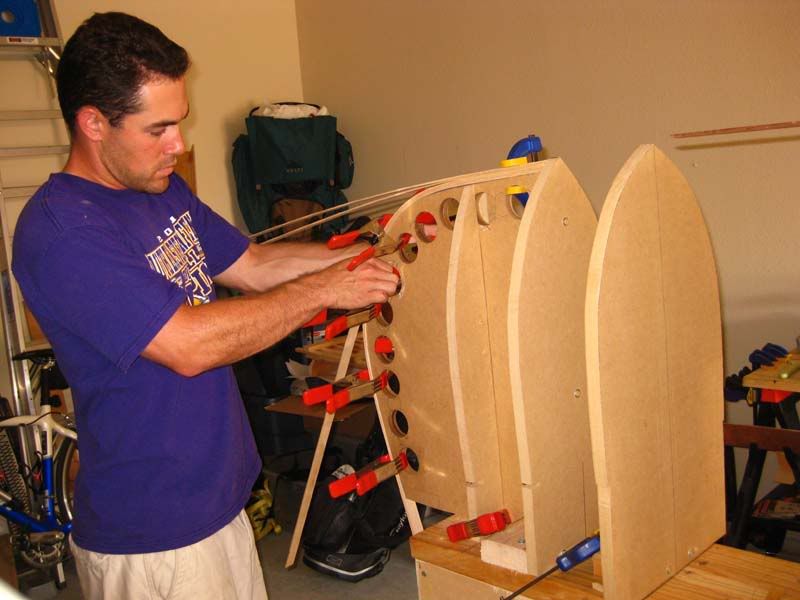
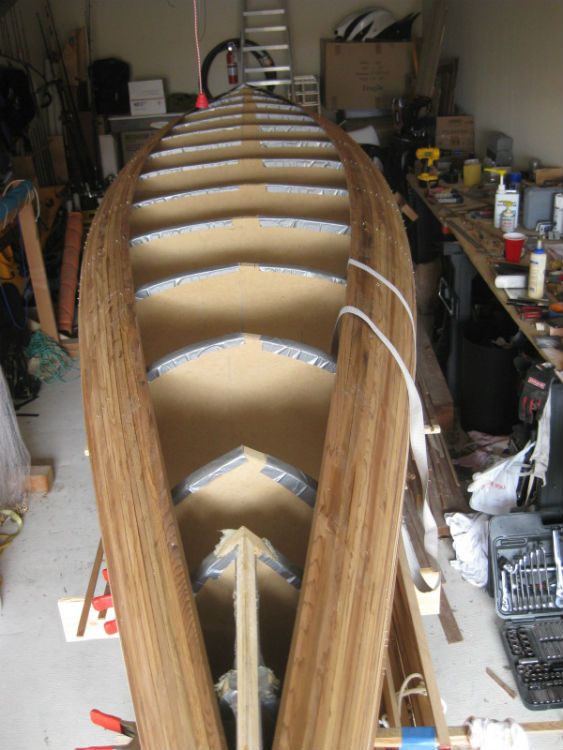
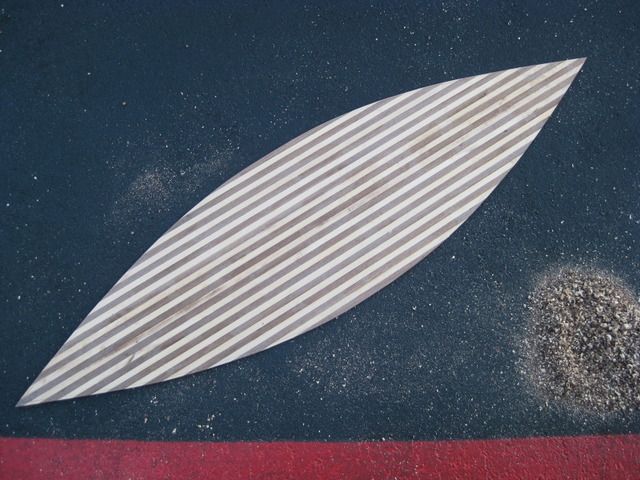
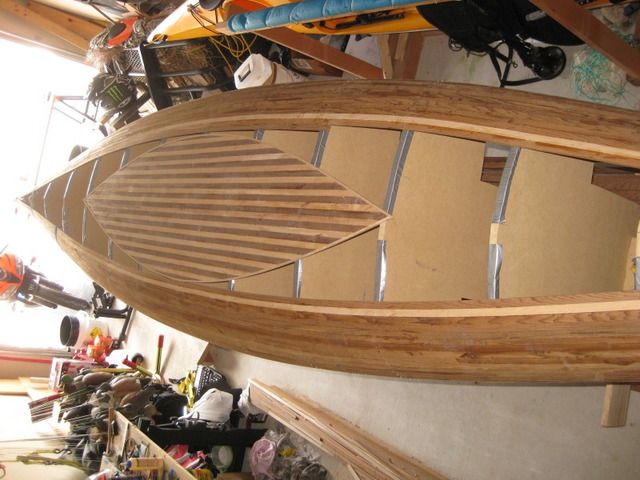
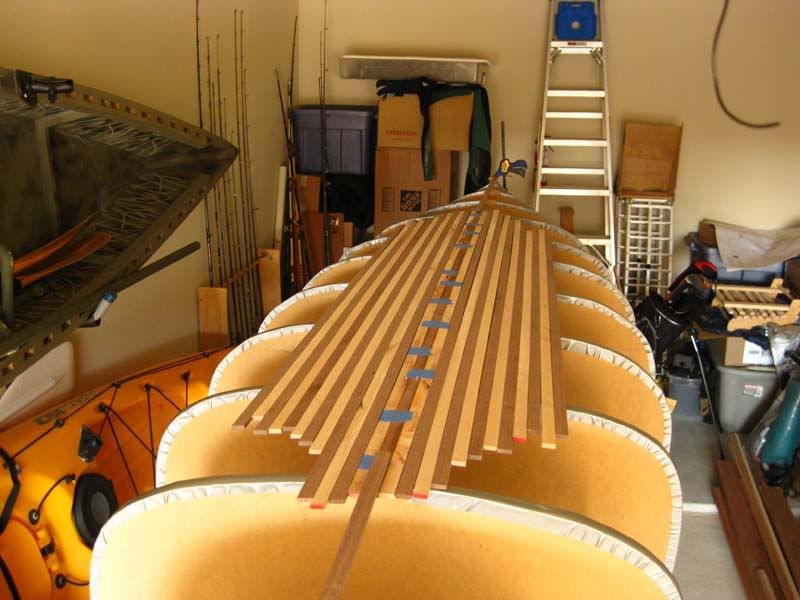
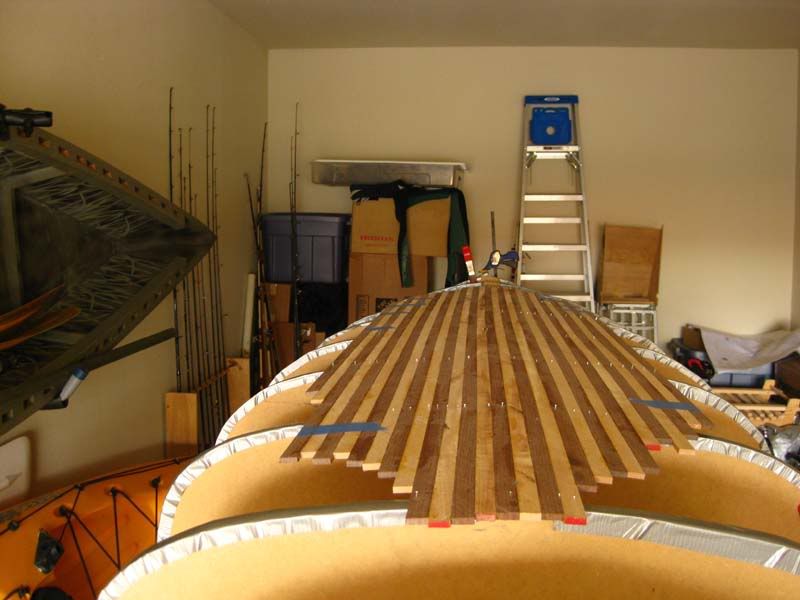
Once all that was in place, it was actually time to start stripping!! I decided to go with doing the football first, thinking it would be easier for me. I put strips out there just doing a dry fit at first, and then got to gluing. Rather than put a few pictures in here of the same thing, a few strips bigger each time, i'll go with a start and finish photo. Football is done now, I'll probably pull the staples and take it off tomorrow.
Image
Image

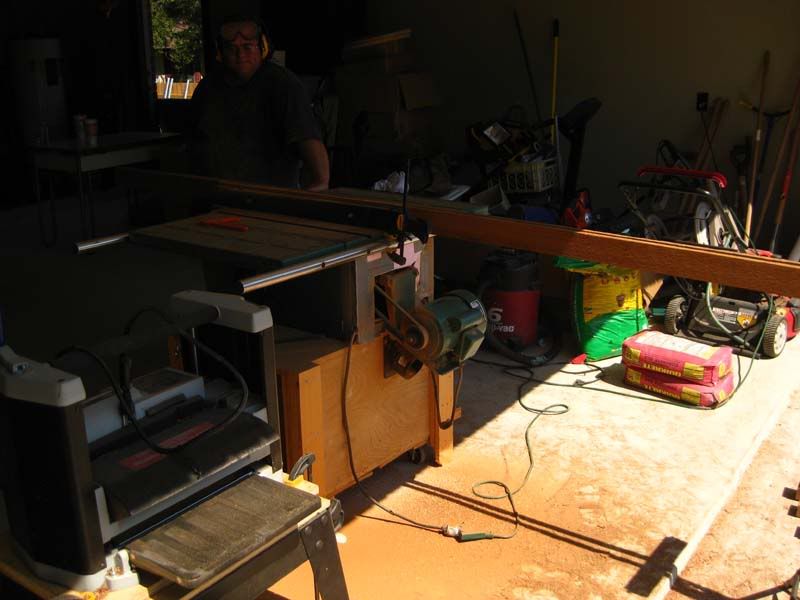
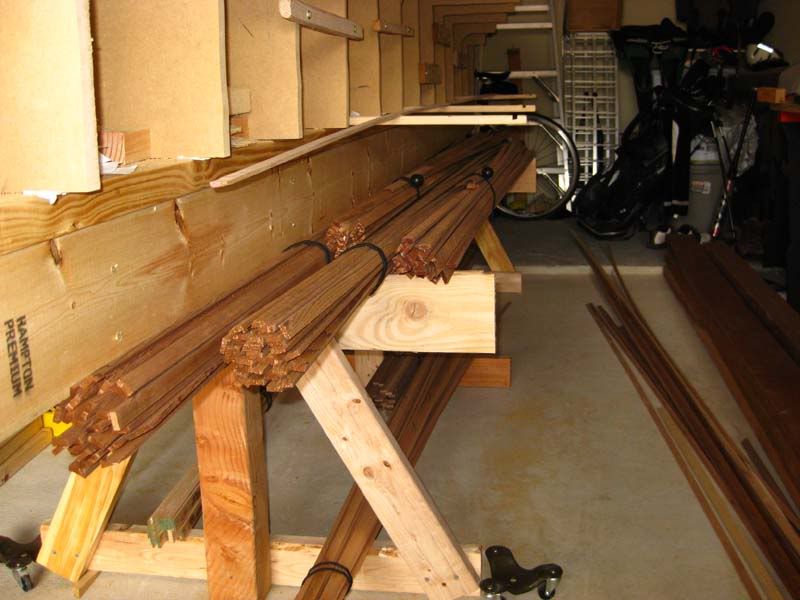
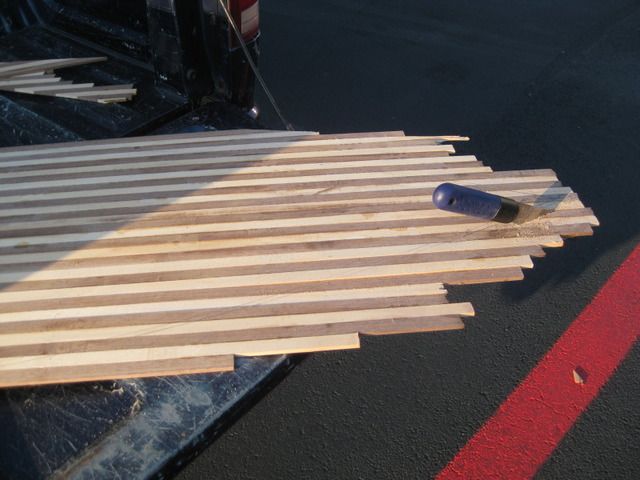
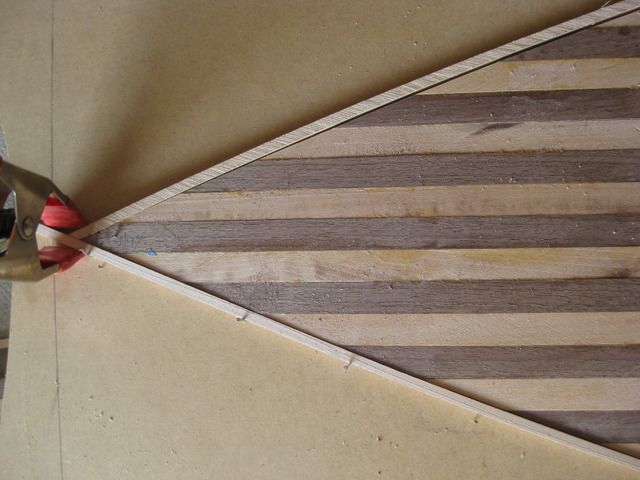
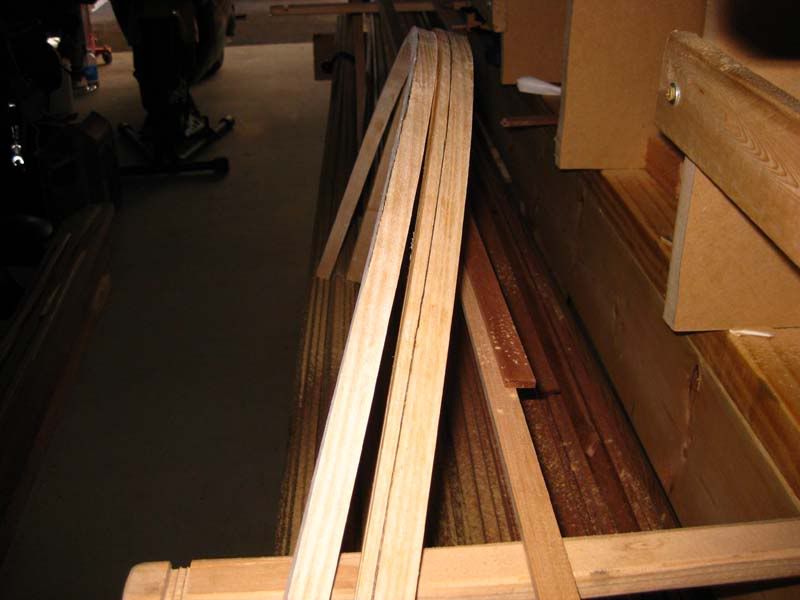
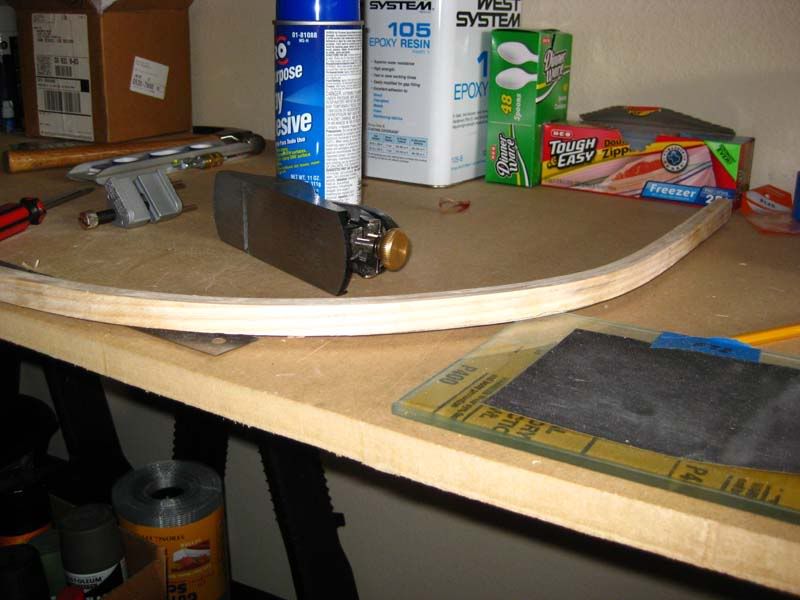
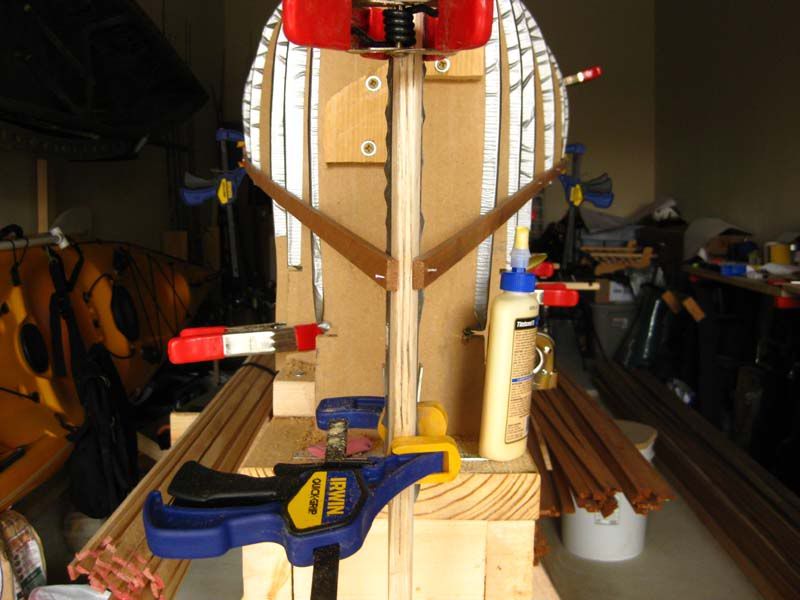
As I was working on this, I was planning my shear strips. I dont have any strips long enough to go the whole length of the boat, so i had to join 2 together. First i tried a scarf joint, and it glued together but when i was eyeballing it as I tried setting the curve, i saw an ugly kink where that joint was sitting. I didnt like it, so i cut the joint and tried using a butt joint. That really didnt get me a good result either, but i was out of ideas at this point. I kept the but joint together, but took scrap strips and put one on either side of the joint to keep the shear strip straight. You'll see what i'm talking about in the pictures coming up. Once i get another strip glued in there, it will take the place of these scrap strips and keep that joint together with a nice smooth curve as if it was one strip.

Image
Image
Image

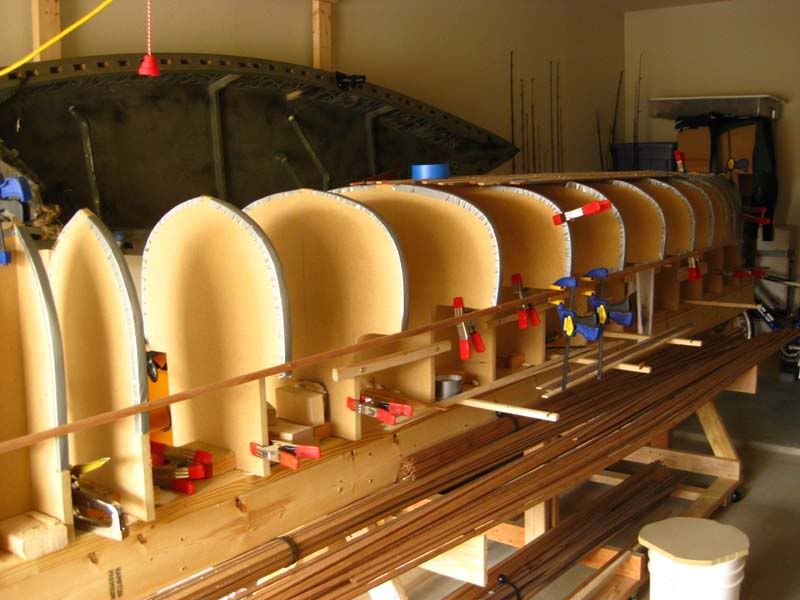
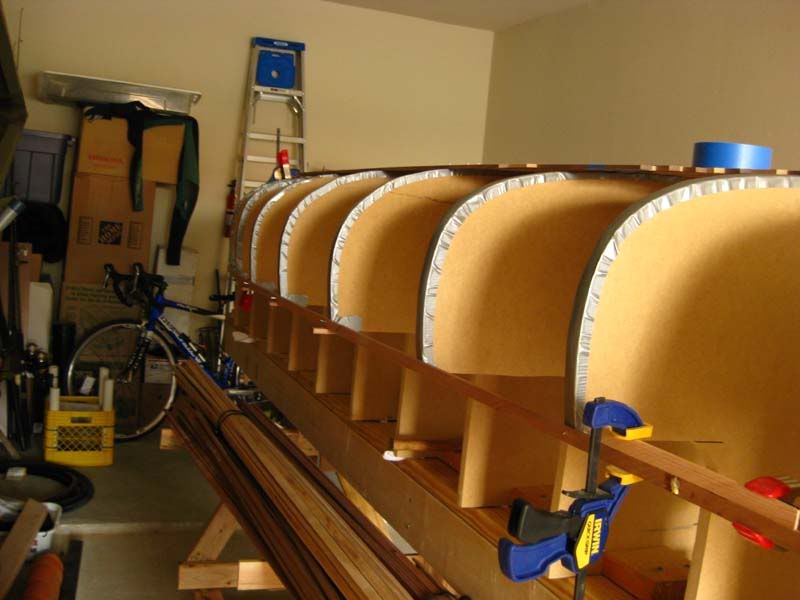
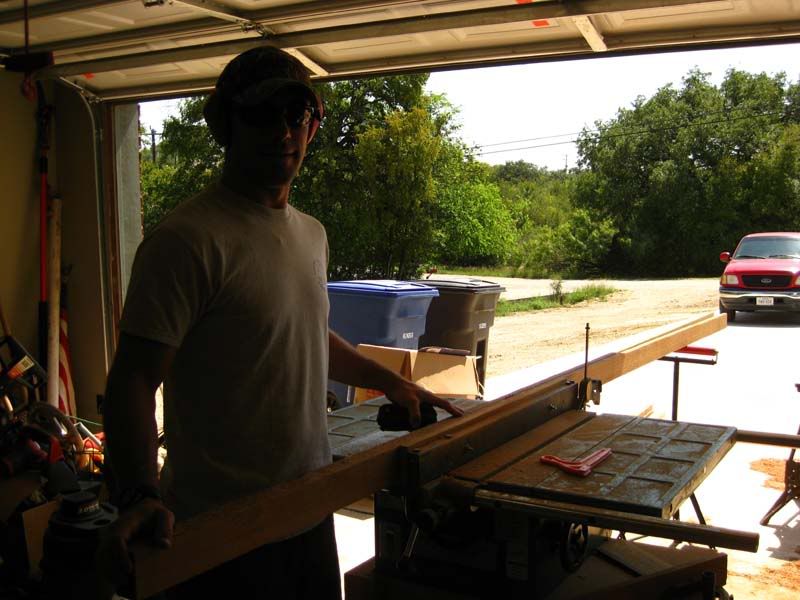
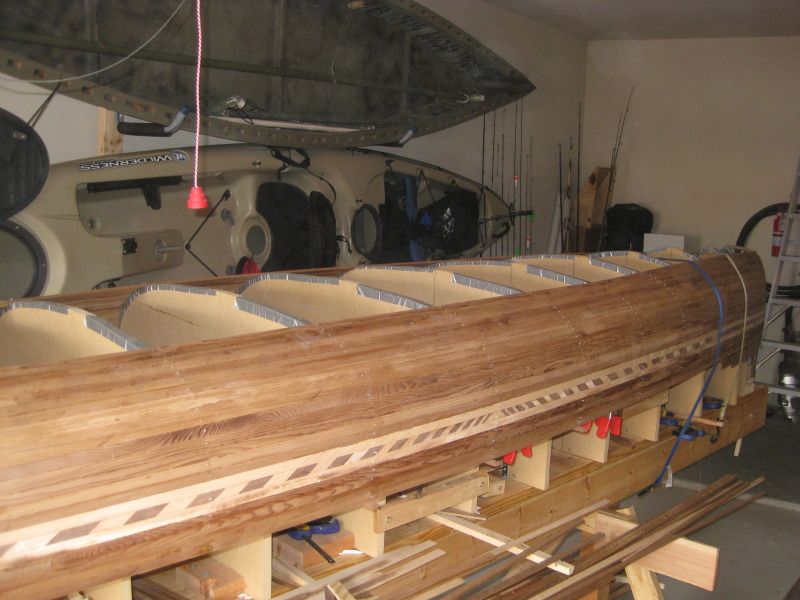
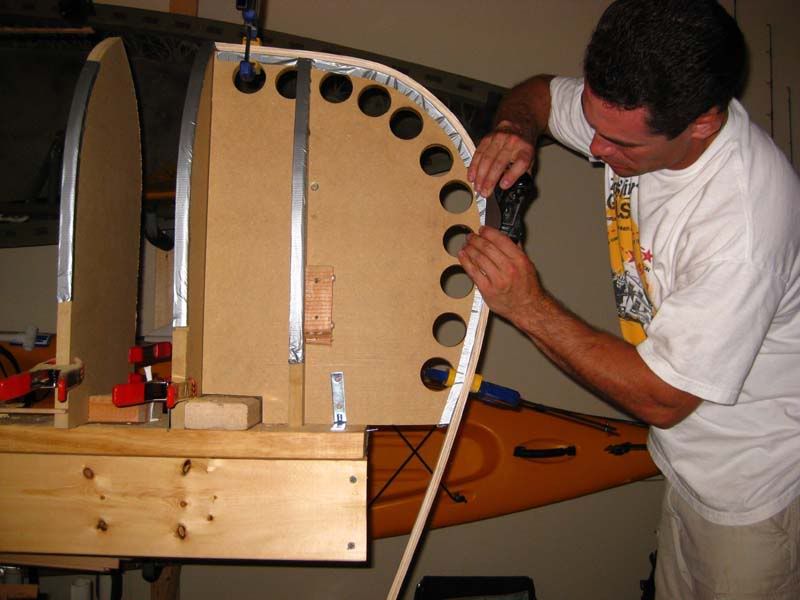
So I'm into the meat of this thing now. The stripping process will slow down a little when i start working on accent stripe. I'm ok with that though, because this is a fun process! Getting those shear strips set was a little nerve wracking. I wanted to make sure they were perfect, and I'd look and look and look at them sitting in place. I liked the curve, it looked ok, but was it perfect?! Well, finally i just took a deep breath and went with what i had. Pulled the staples on each end, put some glue in there and stapled it back to the stem. I think it'll all work out in the end :D
User avatar
ahimsakid
Posts: 47
Joined: Thu Aug 25, 2005 11:56 pm
Location: Round Rock TX

Re: Building an Abenaki...

Post by ahimsakid »

Hey it's looking great . . .keep up the good work! :P
User avatar
StuckInTheMud
Posts: 465
Joined: Thu Jan 22, 2004 12:53 pm
Location: San Antonio

Re: Building an Abenaki...

Post by StuckInTheMud »

Well, this boat is still on the forms. Due to life (school, work, and studying for various things) i've given this boat less attention than I would have liked. Wanted to be done with it by now but thats neither here nor there. Got a question that hopefully someone can help with.

Here's where she stands now

Image
Image


I'm getting to the point where the strips come up to the end of the stem. All up the stem thus far the strips lay nicely against the stem, easy day. This being my first stripper, I'm having trouble figuring out how to continue with the strips since I'm running out of stem to staple them to. Here's what I'm looking at and referring to.

Image

So, did I taper my stem enough to a point along this stretch and I just need to keep trying to staple to it? Tips and advice on how to proceed are welcome. Thanks!
User avatar
Weasle
Posts: 46
Joined: Mon Sep 21, 2009 8:43 am
Location: McKinney, Texas

Re: Building an Abenaki...

Post by Weasle »

This is a great looking build. The area you are working in is one of the most difficult in my book. As a first time builder my self I was able to get through the area by making an external type stem by planing the ends down flat to the keel form elevation then gluing 1/8" thick stips ( a little wider than the two pieces that come together) on top of each other as somewhat of a laminated stern piece. Then planed down the edges to meet each side of boat. Turned out nicer than I expected.
DSC02230.JPG
User avatar
StuckInTheMud
Posts: 465
Joined: Thu Jan 22, 2004 12:53 pm
Location: San Antonio

Re: Building an Abenaki...

Post by StuckInTheMud »

After some advice, I moved forward and put a few more strips down. Then it was time to form the football. It started with this

Image

and after eyeballing it a bunch of times to make sure the oval was shaped how I like, I wound up with this.

Image

I wanted a light colored pinstripe around this so I took some basswood and got to work.
Image

Image

Here's the football in place. Now the challenge begins to fit the strips in around this thing. After attaching the football I tried fitting one strip, it aint gonna be easy :?
User avatar
StuckInTheMud
Posts: 465
Joined: Thu Jan 22, 2004 12:53 pm
Location: San Antonio

Re: Building an Abenaki...

Post by StuckInTheMud »

This is driving me crazy. Now that I am actually closer to finishing the hull, I find that I can't stop thinking about building and all I want to do is work on this boat! It's like I've come around a corner and can see a finish line and I just want to sprint. I know I still have hours of sanding in front of me, as well as stem work, trim work and glass, if this major milestone is close enough to taste victory!
User avatar
makenmend
Posts: 636
Joined: Mon Jun 06, 2005 8:18 pm
Location: Longview E Tx

Re: Building an Abenaki...

Post by makenmend »

Patience is a virtue.

Hang in there your on the right path.

MM
User avatar
bowgarguide
TKF 5000 Club
TKF 5000 Club
Posts: 5370
Joined: Mon Jan 15, 2007 7:52 pm

Re: Building an Abenaki...

Post by bowgarguide »

I do something a little different on my strips ,after they are ripped I then run them through the planer ,sure saves a lot of sanding.
Ron
User avatar
makenmend
Posts: 636
Joined: Mon Jun 06, 2005 8:18 pm
Location: Longview E Tx

Re: Building an Abenaki...

Post by makenmend »

bowgarguide wrote:I do something a little different on my strips ,after they are ripped I then run them through the planer ,sure saves a lot of sanding.
Ron
Ron am I miss understanding here :?: you plane your strips before assembling :?: I assemble my panels then run through planer to uniform size/thickness( 13'' max width with my planer)
User avatar
bowgarguide
TKF 5000 Club
TKF 5000 Club
Posts: 5370
Joined: Mon Jan 15, 2007 7:52 pm

Re: Building an Abenaki...

Post by bowgarguide »

II am talking a full striper ,not s s @ glue.
Or like free forming a deck.
Ron
Post Reply